How to Configure SX.ORG proxy in XLogin

XLogin Antidetect Browser is a dedicated account isolation tool designed for users who work across multiple accounts and platforms. With an emphasis on fingerprint segmentation, secure browsing and scalable workflow, XLogin helps reduce risk while increasing operational control.
Key features:
1. Isolate multiple accounts without getting blocked
Each profile operates like a standalone device. XLogin isolates browser data – such as IP address, storage, JS objects, WebGL, and hardware identifiers – ensuring that no cross-contamination occurs between accounts.
2. Configure independent IP for each profile
XLogin supports both dynamic and static proxies (HTTP, SOCKS5, etc.), allowing users to assign a different IP address to each profile. SX.ORG Proxy is a recommended one for correct workflow.
3. Manage roles and collaborate with teams
Ideal for agencies or remote teams, XLogin allows profile sharing across users with adjustable permissions.
4. Streamline tasks using batch features
With XLogin’s batch creation, cloning and grouping features, users can launch hundreds of profiles with minimal manual input. Ideal for those managing traffic campaigns, testing or performing outreach at scale.
5. Sync profiles across devices
Profiles data can be backed up to the cloud and accessed from any authorized device. Whether switching between machines or managing a distributed team, users can resume work without data loss or setup repetition.
6. Automate repetitive tasks
Easily automate your workflows with built-in automation features and API support – perfect for scaling tasks with external tools.
Step 1: Register an account in SX.ORG
In order to create a proxy port, go to the Create New Port tab.
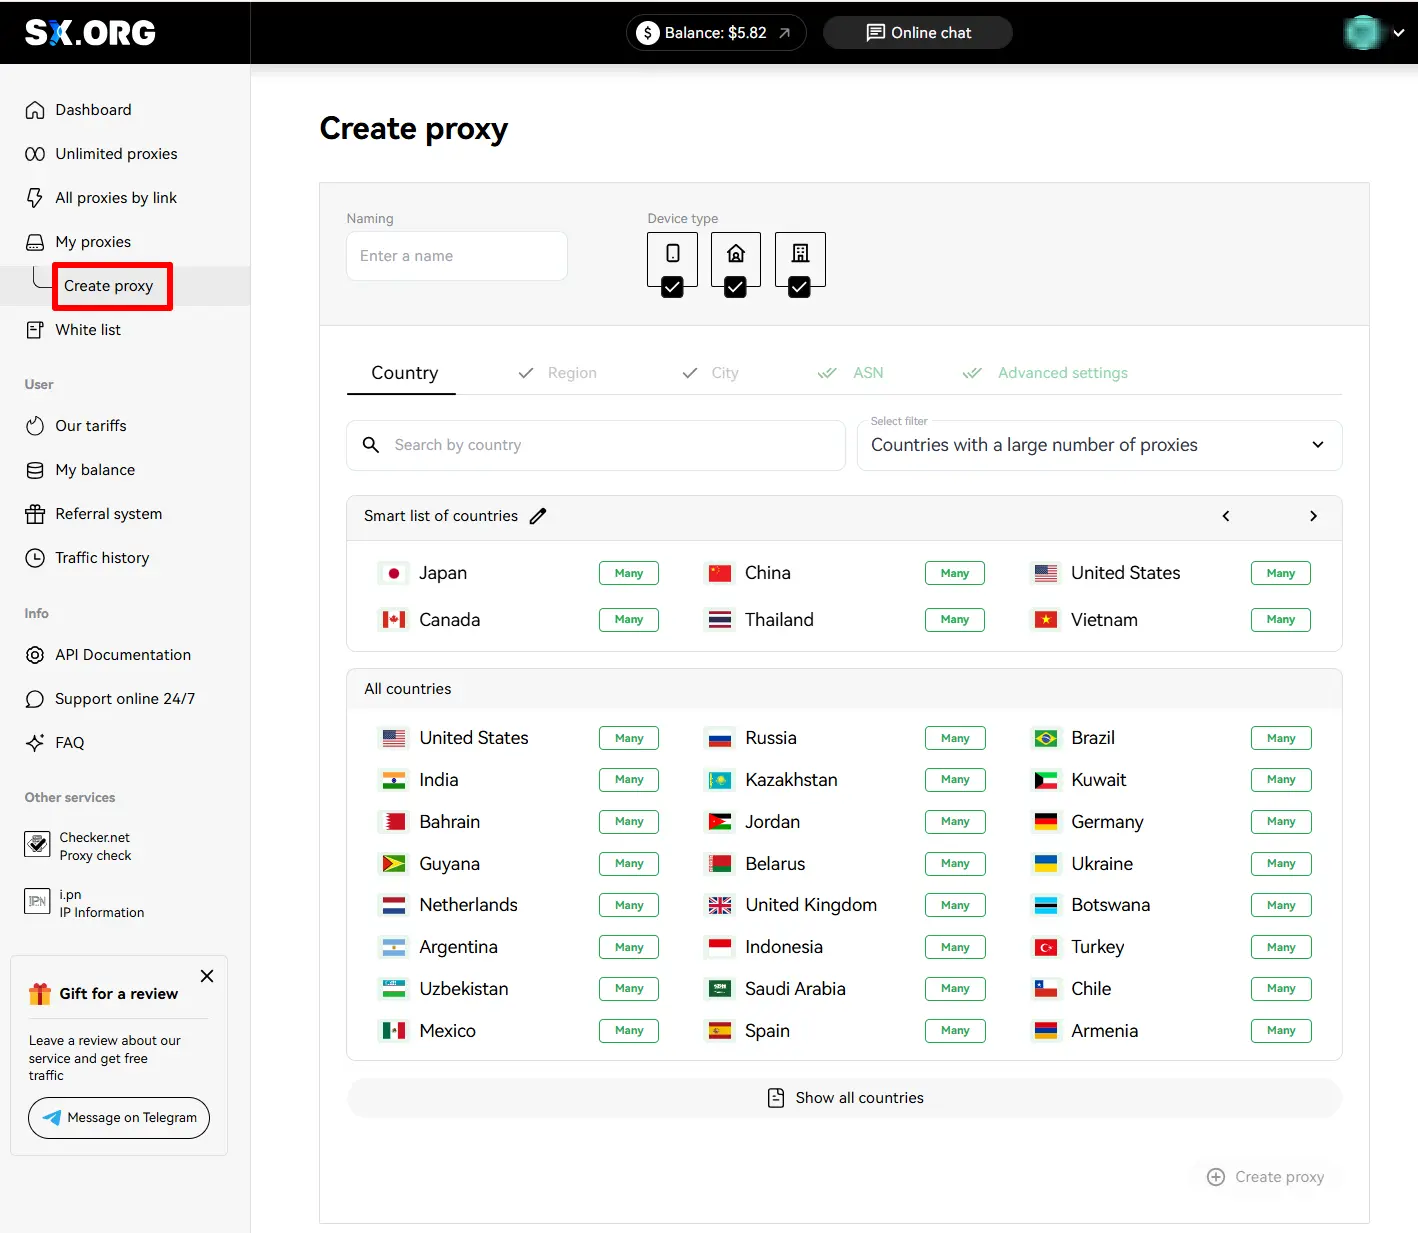
On the first step of creating a proxy, you will be asked to select a country and a proxy type. Above the country selection field you can set the IP type: mobile, corporate or residential (1). Note that all 3 types are selected by default, but for the most stable performance, we recommend selecting only one of those types.
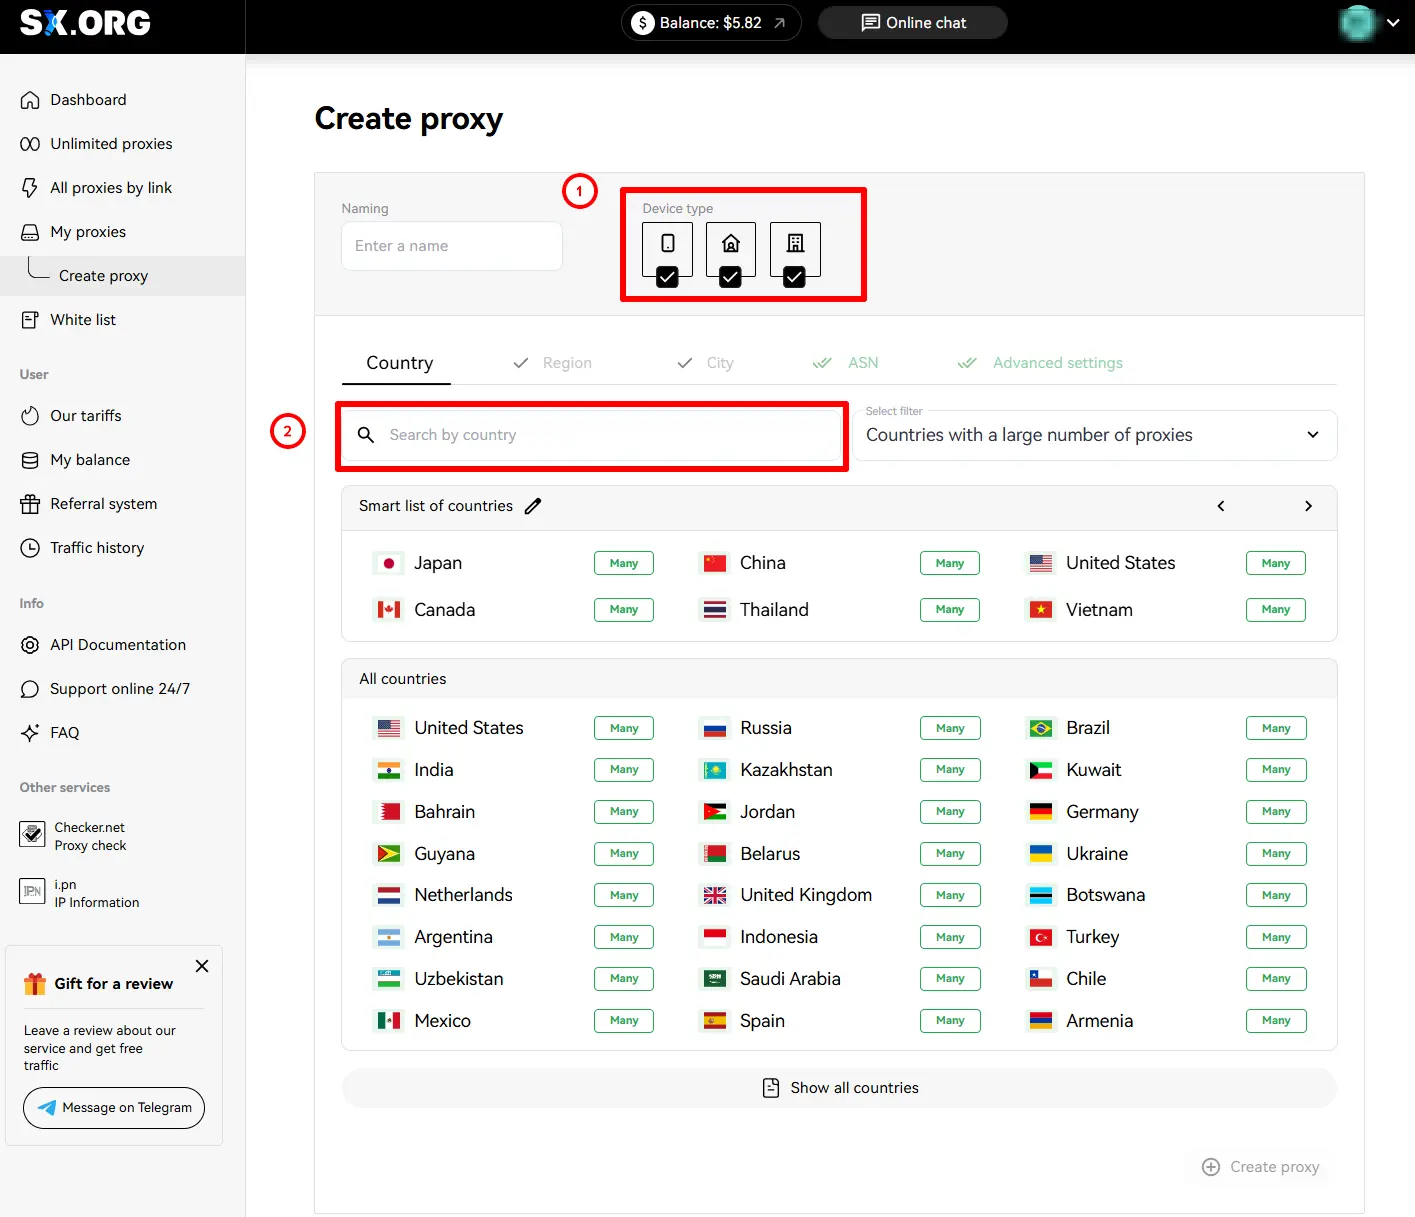
You can find the country you are interested in in the “Country Search” field (2). Just start filling out the name and the dynamic filter will display the most similar results.
After selecting a country, next you can select a region and a city you are interested in. If you don't know in which region the city of your choice is located, worry not, when selecting the city, the region will be selected automatically.
Next you can set the ASN (Internet Service Provider). We recommend leaving this option by default.
At the last step you can choose a name for your proxy, quantity, rotation type and authorization type.
Next, you can choose a type of IP behavior (3).
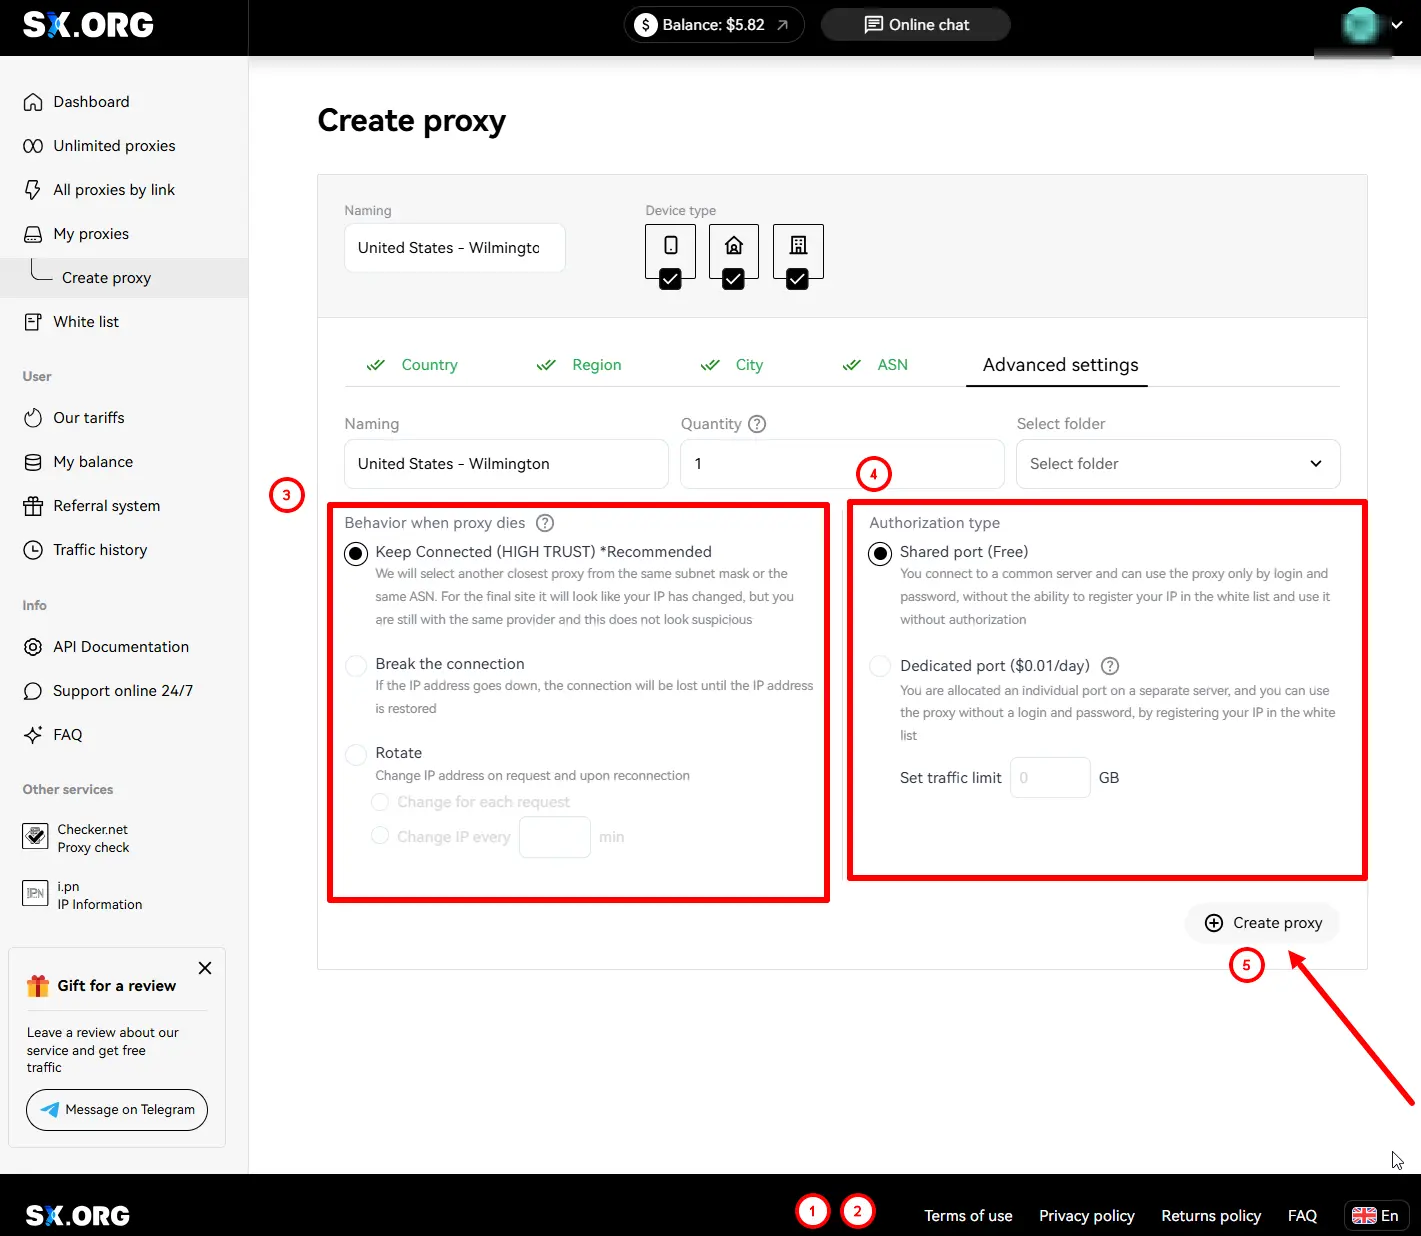
“Keep connection” (default) - if the current IP stops operating, the system will replace it with the closest similar IP of the same subnet or the same ASN.
“Break Connection” - if the IP disconnects, the connection will be halted until the current IP becomes online again.
“Rotate” - with this type of behavior, the IP address is being changed with each request.
And the last step is to select the authorization type (4):
“Login and password authorization only” (default) - the proxy is being authorized by login and password only. Note: IP addresses of devices added to your whitelist cannot be used with this type of proxy.
“Authorization by whitelist or authorization by login and password” - this type of proxy allows you to establish connection via IP:PORT credentials of the proxy, without specifying login and password, as long as the IP address of your device is provided in the whitelist.
*Please note, this option requires a fee ($0.01 for each port of this type on your account will be deducted from your balance once a day).
Upon setting all the preferences, click Create Port (5), and the proxy generation will start taking you to the main screen of the My Proxy Ports page.
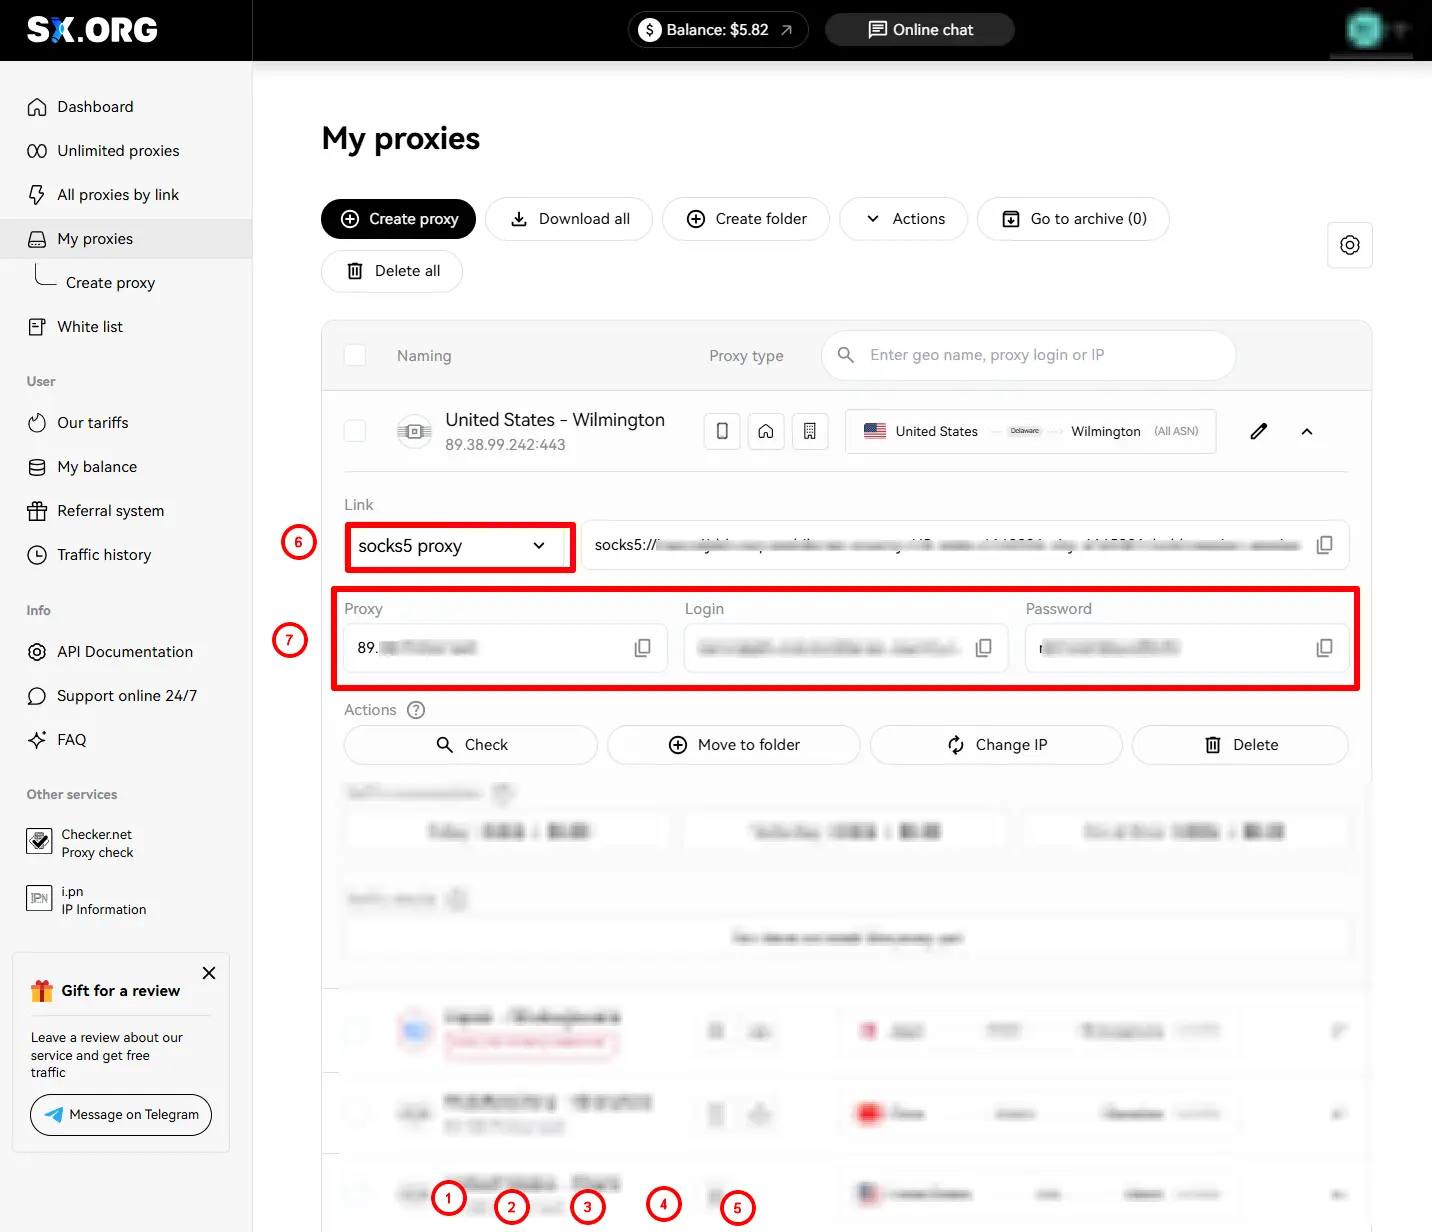
Now you need to select the proxy type (6)
Next, copy the proxy URL, login and password (7)
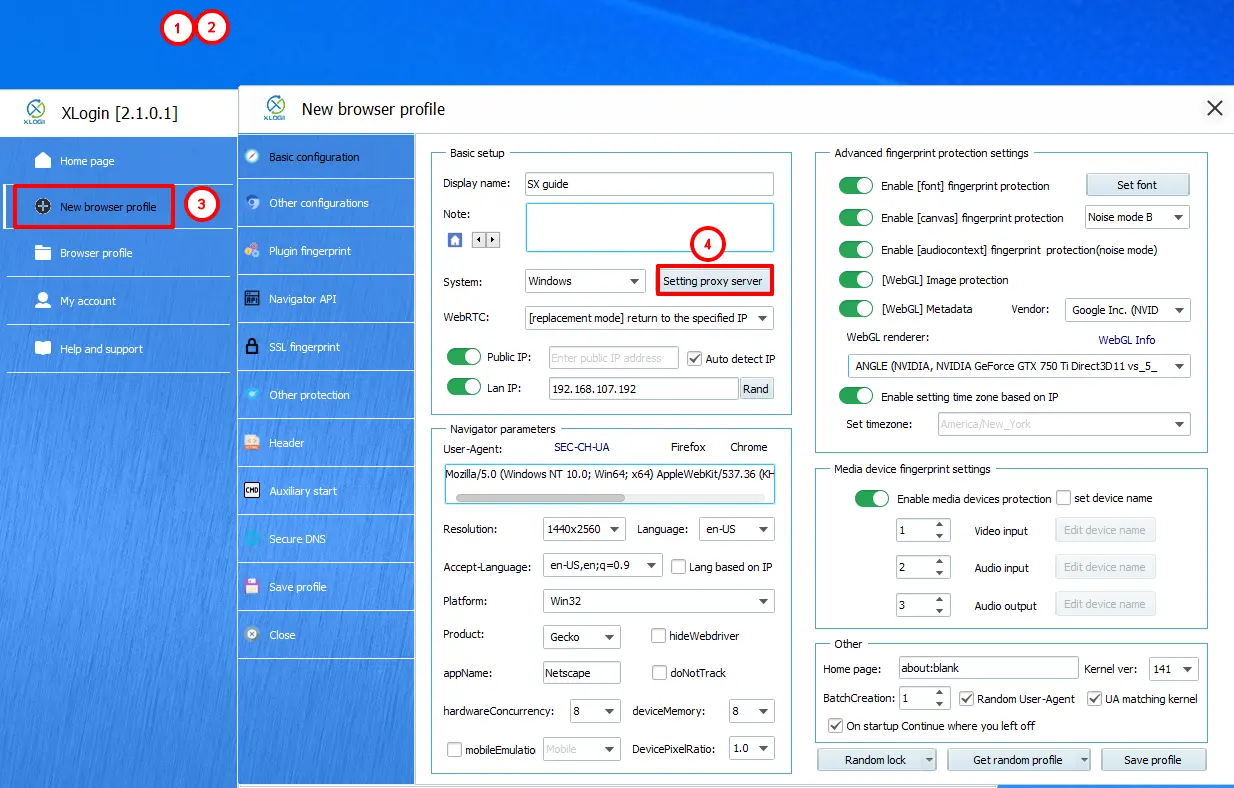
Step 2: Open your XLogin app “Support Free Trial”
Open the New browser profile section and find the Setting proxy server section.
Paste the proxy information directly into the appropriate field.
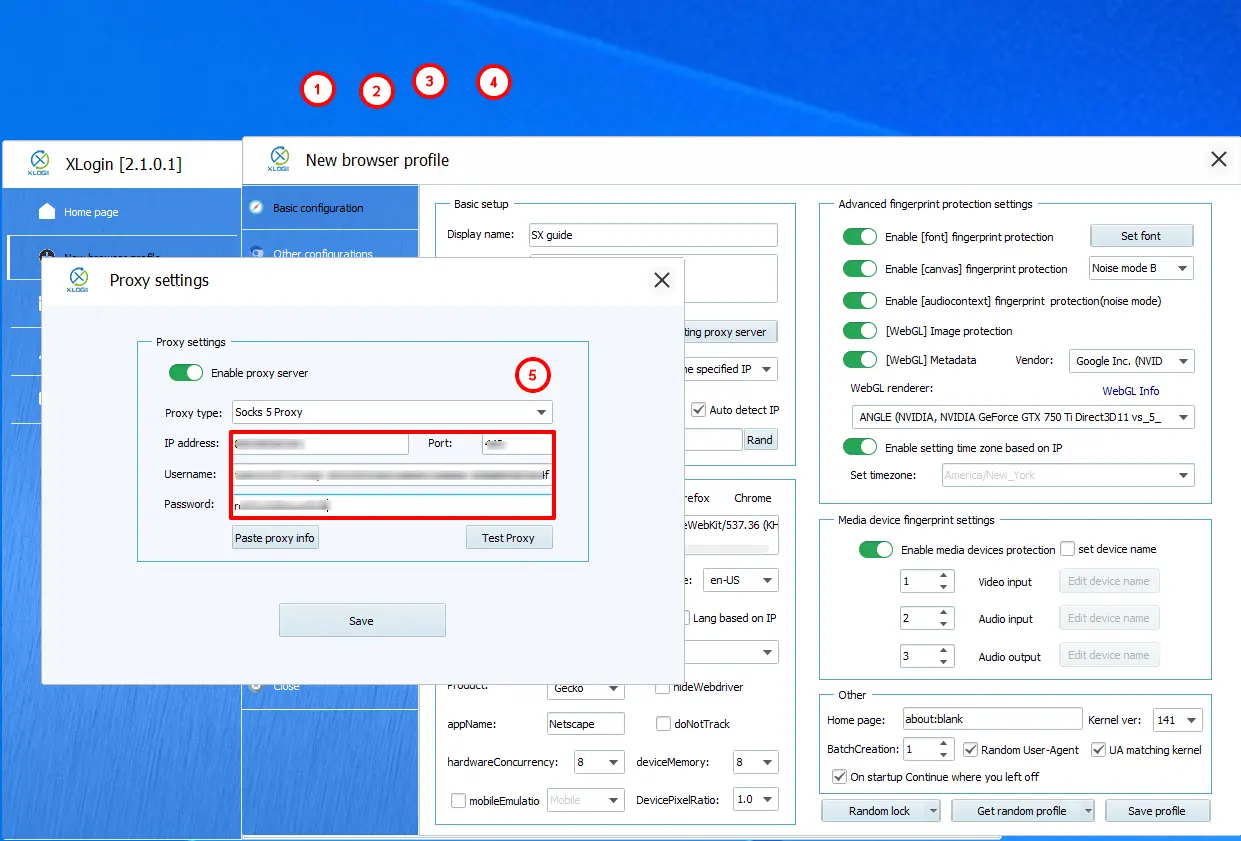
Tap Test Proxy and check the GEO of your IP.
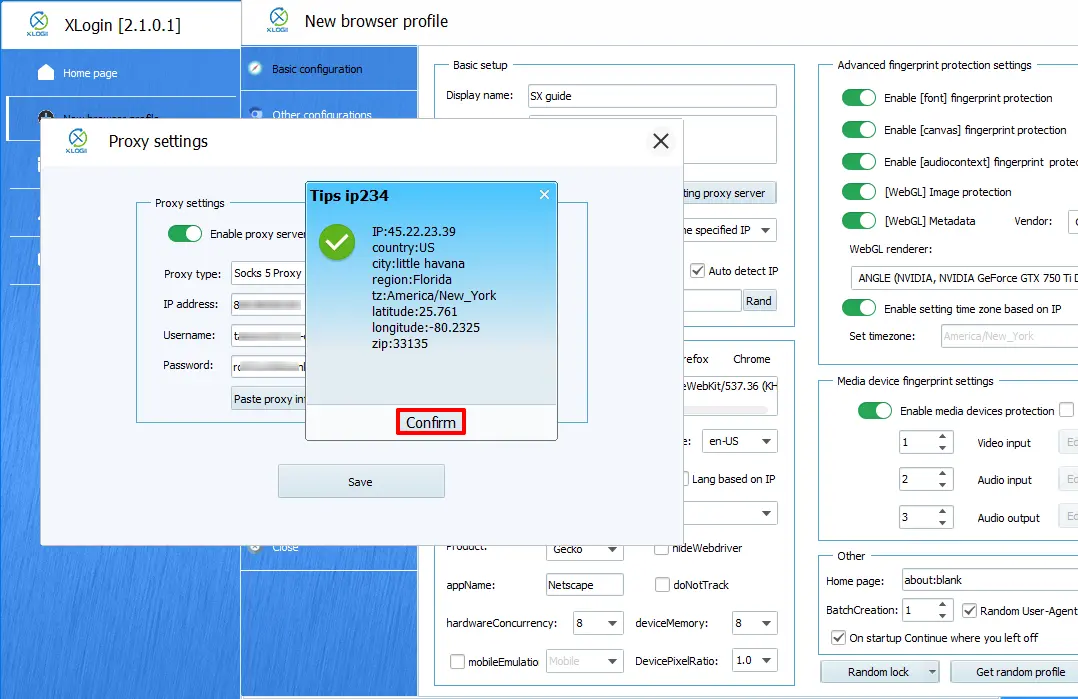
That’s it! You’ve successfully integrated SX.ORG proxies with Xlogin Anti-Detect Browser and you’re ready to go.